
If you've walked out to a Jackson bed after a hard rain and found mulch washed into the grass, weeds poking through the edges, and bare soil showing again, you already know why garden fabric keeps coming up in local conversations. It looks like a clean fix, and sometimes it is, but in West Tennessee it only works when the site is prepped right and the drainage makes sense for the yard. Done poorly, it turns into another layer to dig up later.
Ground cover fabric installation sits in that middle ground between useful and misunderstood. The material can slow weeds, help hold soil on slopes, and support a cleaner mulch bed, but it is not a forever solution. Extension-style guidance warns that fabric can degrade in sunlight in as little as one year and often gets buried under later mulch, which turns a simple install into a maintenance problem if you treat it like a set-it-and-forget-it product. That's why the choice matters as much as the installation.
Understanding Landscape Fabric Benefits And Limitations
A lot of Jackson yards fight the same battle. The back bed gets hit with afternoon sun, the front slope sheds mulch after a storm, and weeds seem to come back stronger every time the bed gets cleaned up. In that setting, garden fabric can help create a cleaner start, especially where you want to separate soil from mulch and slow early weed pressure, but it won't erase the maintenance cycle.
What fabric does well
Used correctly, fabric gives you a physical barrier between the soil and the top layer of mulch. It's especially handy in new installs where the bed has just been cleaned out and you want to keep fresh mulch from mixing straight back into the dirt. It also makes sense in select erosion-prone spots where you need a layered system instead of mulch alone.
Practical rule: If the bed is permanent, shaded by mulch, and easy to refresh, fabric can help. If the bed will be constantly top-dressed or repeatedly disturbed, it can become harder to manage than it's worth.
Where the drawbacks show up
The problem starts when people think fabric replaces every other weed-control step. Weeds can root into the mulch above it, and debris can build up on top until the fabric becomes buried. Once that happens, cleanup gets annoying fast, especially in ornamental beds that keep getting new mulch dumped over old layers.
If you're deciding between fabric and a mulch-only approach, it's worth comparing it against the right ground cover strategy for the bed itself, not just the lowest upfront effort. A good starting point is this practical guide to the best mulch for landscaping. In a lot of West Tennessee yards, the right mulch choice does more long-term good than trying to force fabric into every bed.
Planning And Preparing Your Site
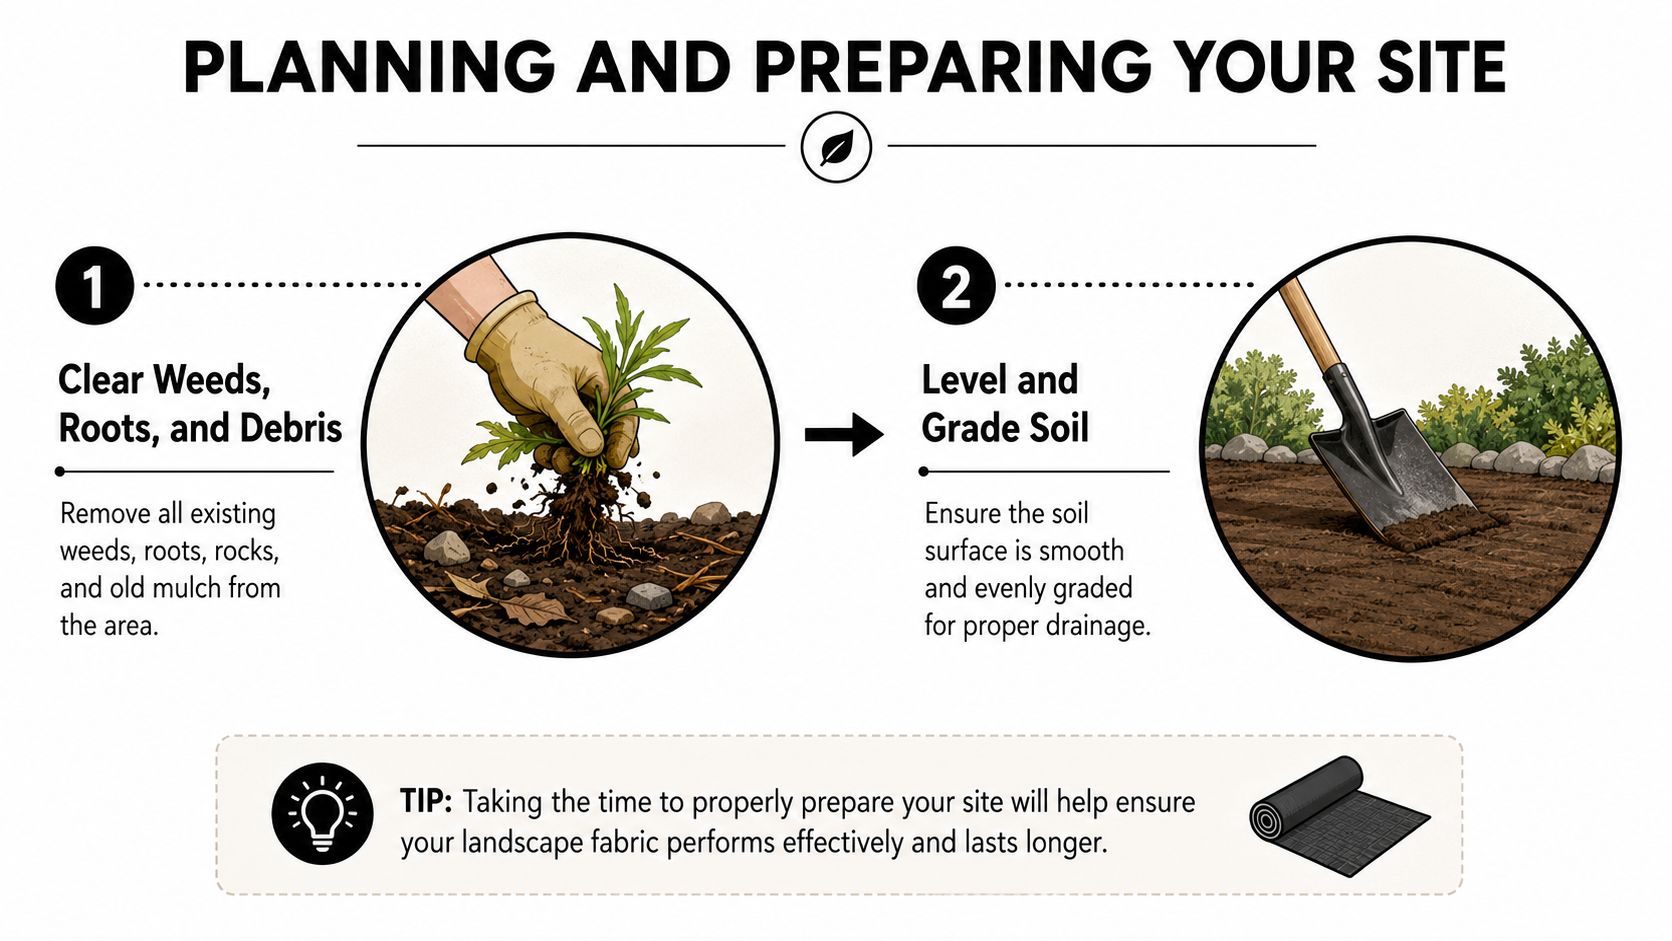
The install starts before a roll ever touches the ground. If the bed still has old roots, clumps of dead grass, rocks, or a half-buried layer of old mulch, the fabric will follow every bump and low spot underneath it. That is how you end up with wrinkles, puddles, and seams that never lie flat, especially in West Tennessee yards where clay soil and slow drainage expose every bad grade.
Clean first, then shape the bed
Pull every weed you can get by the root, not just the top growth. Rake out sticks, rocks, and old mulch so the surface is smooth, then level the bed enough that water has a sensible path through it instead of standing in low pockets. On a Jackson slope, I would rather see a bed graded cleanly than overworked into a soft bowl that traps runoff.
A clean base matters in hardscaping too. If you are setting edges or building a patio, the same prep discipline shows up in Neasden Hardware's guide to laying patio, because a level, stable base keeps the finished surface from shifting later.
If you are pairing this with a larger yard refresh, the prep process should feel familiar from sod work too. A clean base matters in both cases, and the same mindset shows up in new sod installation prep, where grading and cleanup decide whether the finish holds up.
Measure with waste in mind
For a simple bed, measure length and width, then map the shape on paper or with string and stakes. For larger installs, budget extra fabric for waste and seam overlap because a standard 3-by-100-foot roll loses usable coverage once overlaps are added, according to the installation benchmark at Pilling No More. That extra material sounds wasteful until you are on-site trying to bridge a corner or a curve without leaving a gap.
In yards with odd angles, I would rather have too much fabric than too little. Short seams cause more trouble than a few leftover feet ever will.
If the bed edge needs a hard visual boundary, mark it before you cut anything. That way, the fabric is not being shaped to guesswork while you are already kneeling in the dirt.
Gathering Tools And Materials
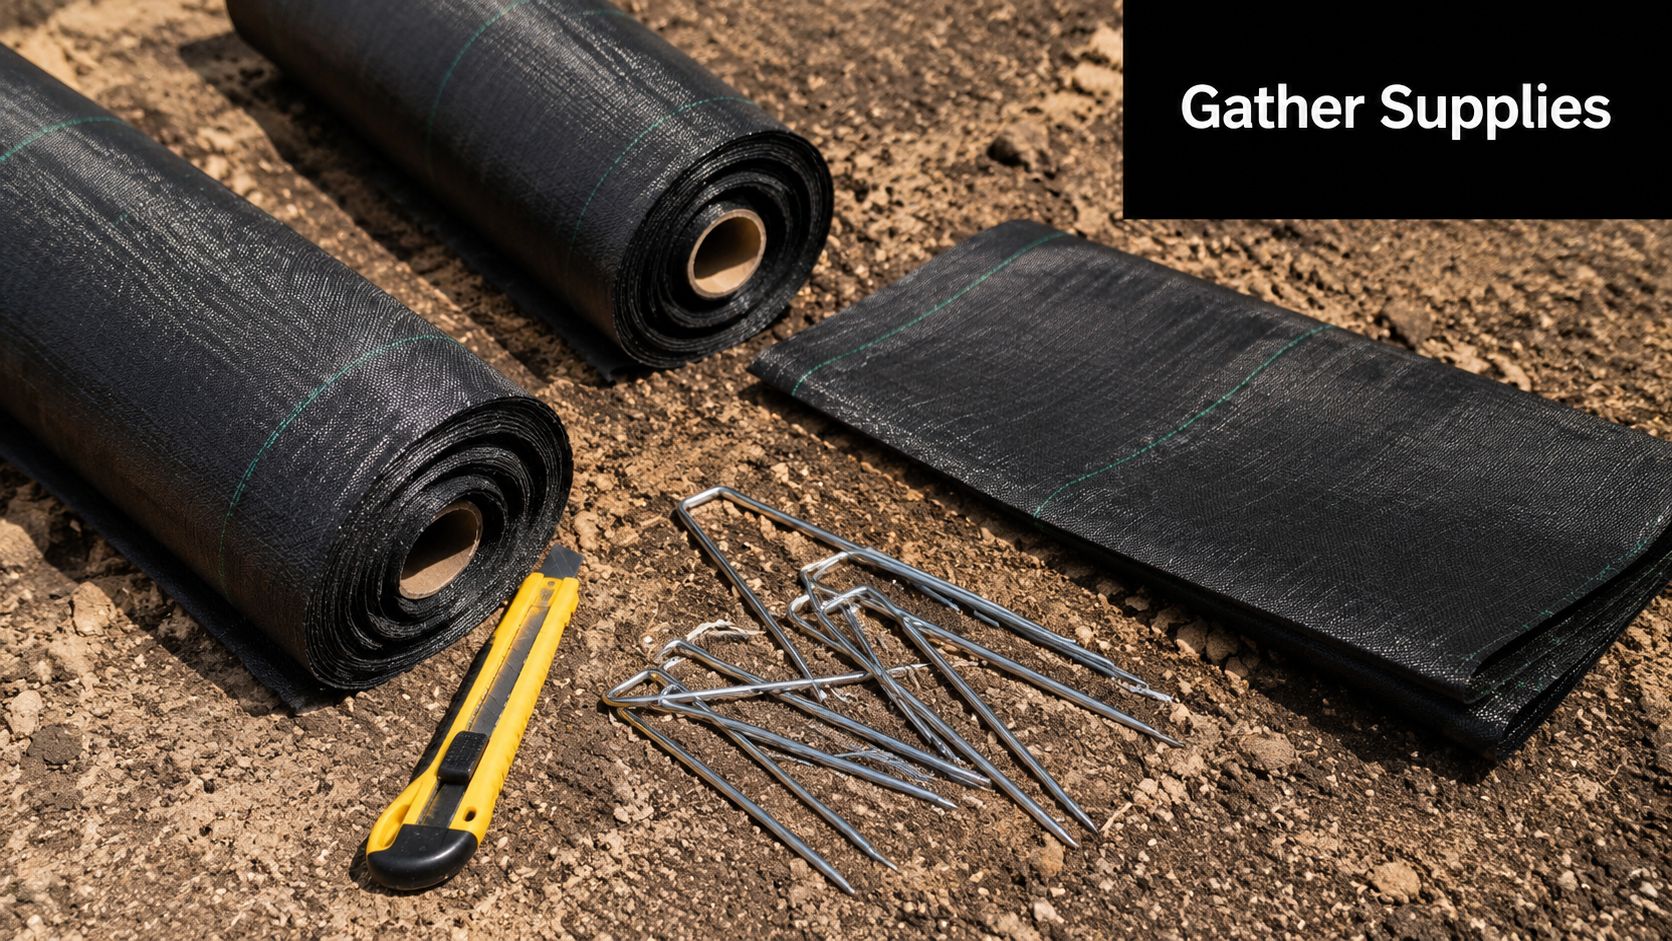
A clean install goes faster when the tools are already on site. I keep a sharp utility knife or scissors, a tape measure, a rake, a shovel, and a solid stack of staples or pins within reach before I ever roll out material. A 6-inch U-shaped staple is a good standard because it holds the crown flush instead of letting the fabric ride up or poke through the surface.
Pick the right fabric and fasteners
The product on the shelf needs to match the job. In beds where water movement matters, the fabric has to work with the site, not against it. Woven material usually makes more sense where strength and flow are priorities, while lighter beds and some garden areas may call for other geotextiles depending on the layout.
Regional drainage changes the choice too. In West Tennessee, heavy rain can turn a bed into a holding pond if the grade is already flat or the soil stays tight, so I pay close attention to how much water needs to pass through and where it will go after it gets under the cover. Fasteners matter just as much, because soft, wet soil will loosen weak pins faster than folks expect.
The installation cost benchmark matters here too. In the U.S., ground cover fabric installation averages $0.48 to $0.99 per square foot, so a 1,000-square-foot bed typically lands between $480 and $990 before mulch and plantings, according to Homewyse's installation cost guide. That is useful because it reminds homeowners that the cover itself is only part of the bill.
Don't skip the cover layer
Fabric needs protection from sunlight and movement. Extension and market guidance both point to covering it with 2 to 3 inches of mulch to reduce UV exposure and keep the material in place, while also pinning it properly at the seams and edges, as summarized in market guidance for garden fabric. If you leave it exposed, it will age faster than it should.
Mulch choice affects how the bed holds up over time, especially in wet weather. A layer that stays put, sheds a little impact from rain, and does not break down too fast helps the fabric do its job, so it is worth comparing options with a practical guide like best mulch for flower beds.
Installing Landscape Fabric
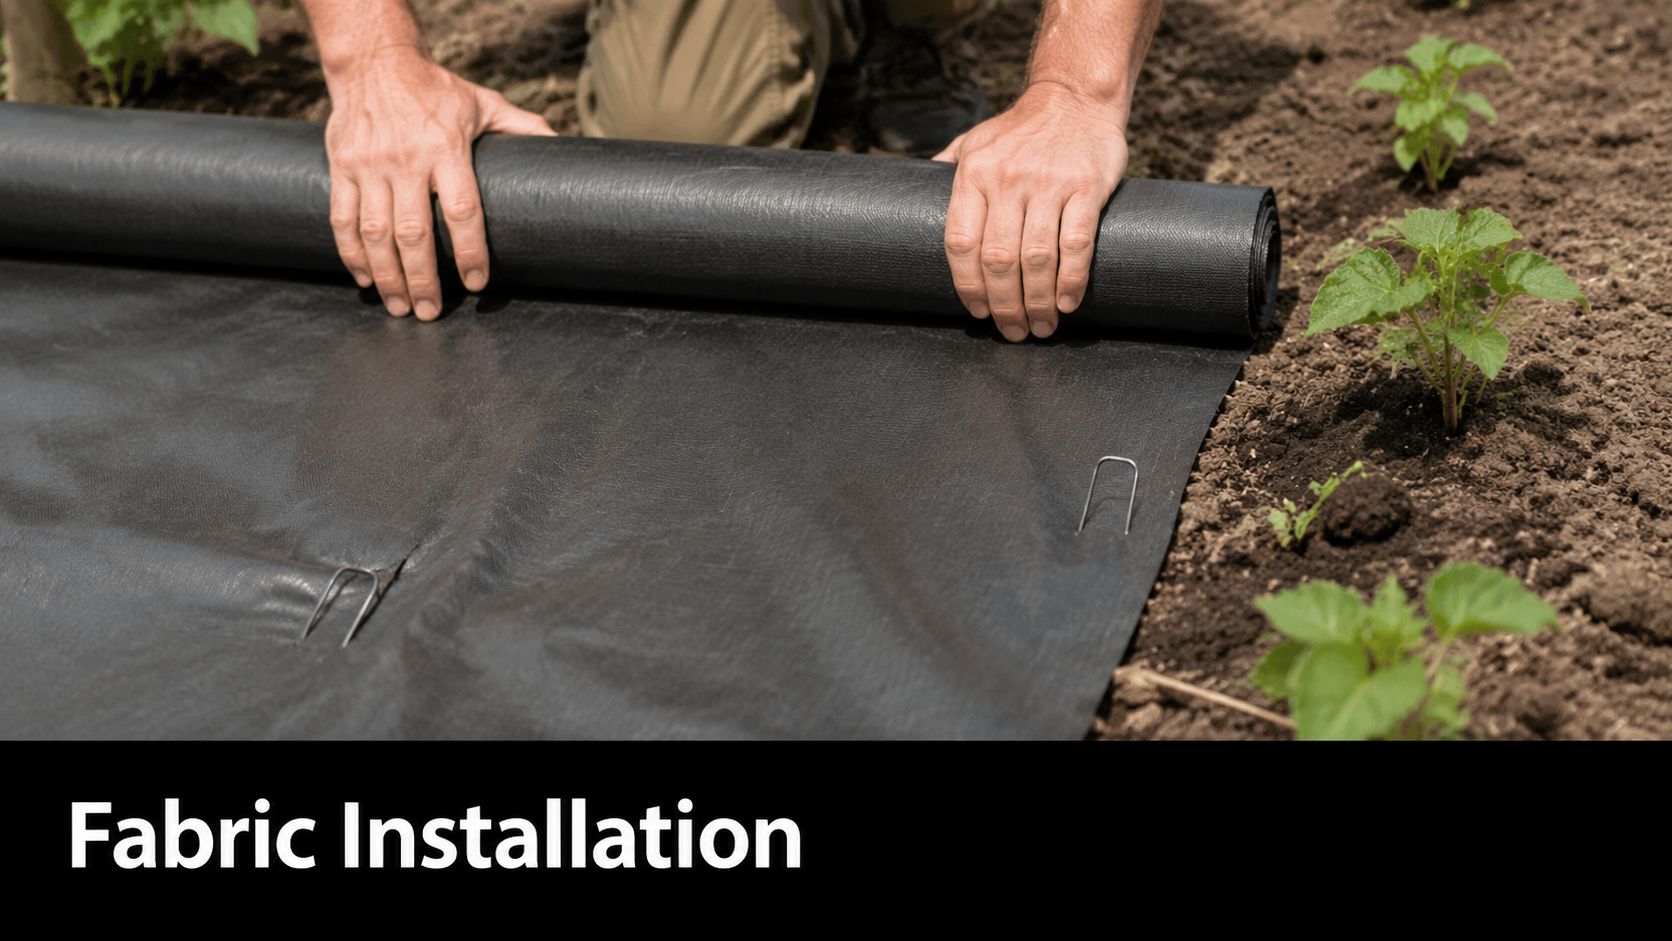
A good install starts with the first few feet. Set the roll from the highest point or the back of the bed, pull it taut but not stretched, and let it follow the grade instead of fighting it. If you yank it tight, the soil shift that follows will work the pins loose faster than you want.
Cut and overlap with discipline
Where two pieces meet, overlap them by 4 to 8 inches. That overlap keeps a gap from turning into a weed line, especially after a few hard rains and a little settling. Pin the edges every 1 to 2 feet and in field areas every 2 to 3 feet, then add more pins where the bed curves or where wind will tug on the fabric, as noted in the market installation guidance.
Cut around plants with an X-shaped slit or a clean opening just large enough for the crown. Bigger holes leave too much bare soil exposed, and those oversized openings are usually the first places that start looking rough. Tuck the cover under edging whenever you can, especially along borders that take runoff or foot traffic.
Secure, plant, then mulch
Drive each staple until the crown sits flush with the surface. If the head sticks up, it catches rakes, shoes, and mower edges, and those small snags turn into failures later. On installs with new shrubs or perennials, set the plant first, then fold the cover back neatly and cut only what you need.
A clean finish comes from the layering, not just the cloth under it. A utility knife, a rake, and a stack of pins will do the work if you stay patient and keep the surface even while you move. Keep the pins clear when the mulch goes on, because a shifted staple near the edge usually shows up later.
Best habit on mulch day: spread from the edge inward and keep the wheelbarrow paths off the pinned seams.
Once the cover is down, mulch it right away. The mulch shields the cloth from UV, holds it in place, and gives the bed a finished look instead of a temporary one.
Ensuring Proper Drainage And Erosion Control
West Tennessee yards don't all behave the same way. Some bottoms stay wet after every storm because the soil is heavier and slower to drain, while higher knolls can shed water faster and expose roots if the grade is too bare. Fabric can help in both places, but only if you match it to the drainage job instead of using one layout everywhere.
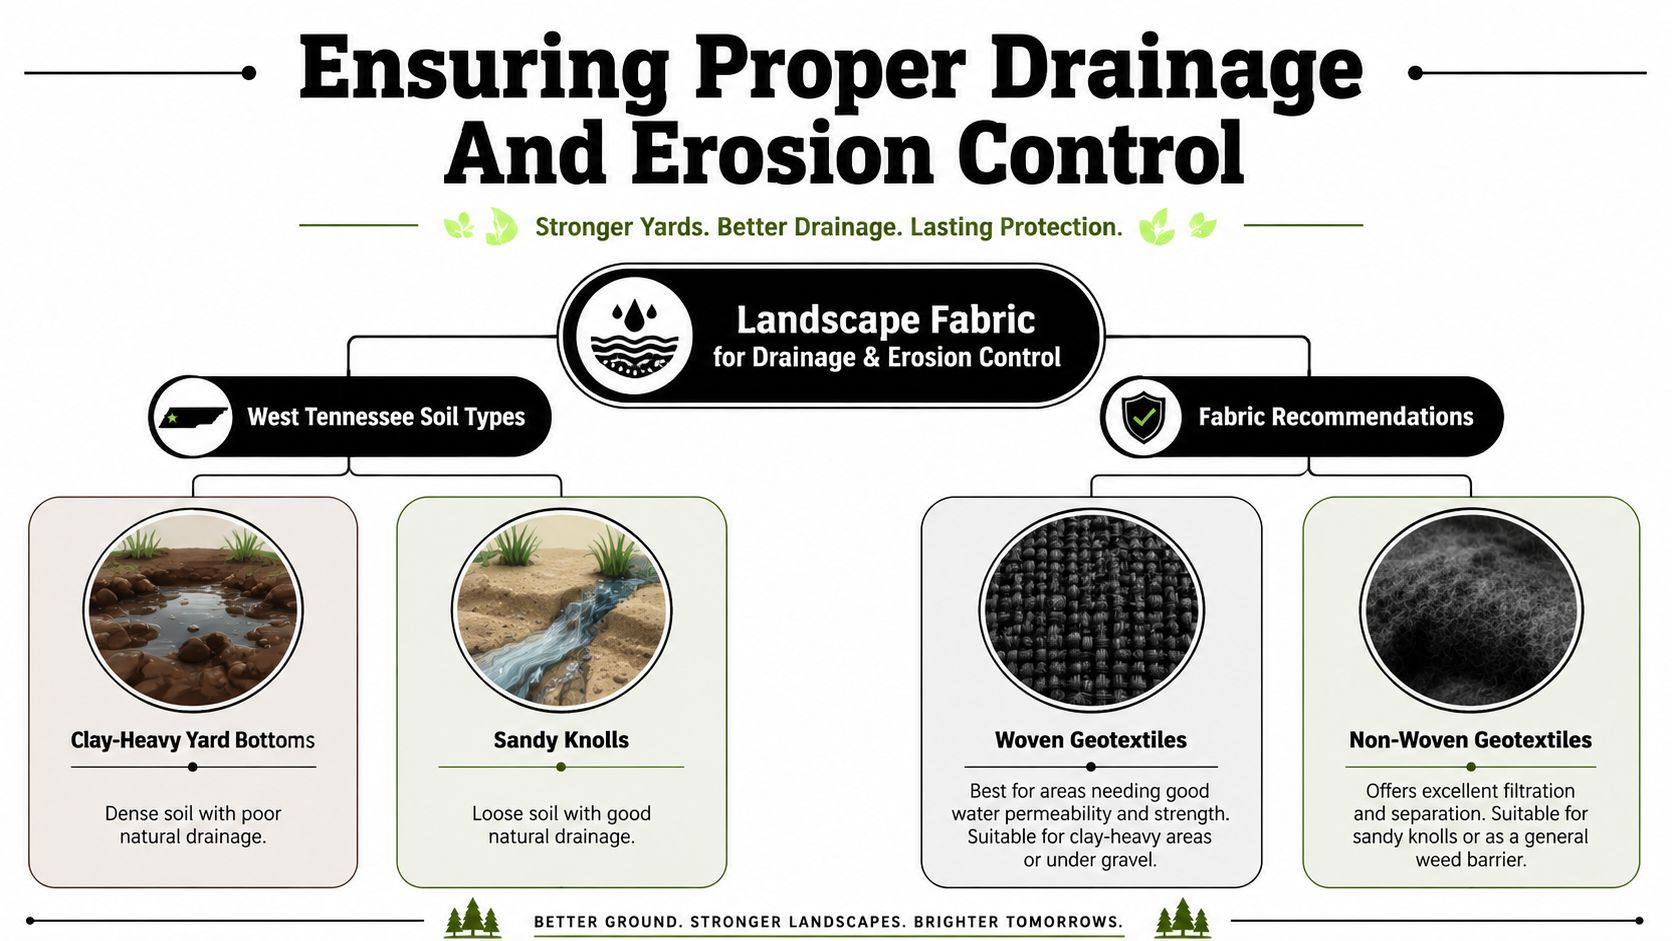
Match the fabric to the site
Ordinary fabric can trap lateral water if the subgrade isn't prepared well, and guidance for wet zones recommends high-flow woven fabric along with French drains at bed bases when rainfall and runoff are persistent, according to Alibaba's installation advice for high-rainfall areas. That matches what a lot of installers see in Tennessee, where the bed itself may look fine until the next hard rain pushes water sideways under the surface.
If you're working a slope, the goal is to keep soil where it belongs without creating a water dam. That usually means thinking about the bed as part of a drainage system, not as a decorative strip. For slope-specific thinking, this guide on preventing soil erosion on slopes fits the same problem from another angle.
Use fabric as part of the drainage plan
Under the right conditions, fabric can separate soil from gravel, stabilize a shallow swale, or help keep erosion control layers in place. Under the wrong conditions, it can make water behavior harder to read because the surface looks finished while the subsurface still holds water. That's why clay-heavy yard bottoms and low pockets need more attention than a standard bed-and-mulch install.
The practical call is simple. If water already lingers in the area, solve the drainage first, then install the fabric. If the bed is mostly about weed suppression and surface stability, the layout can be lighter and more conventional.
When the site is the real issue
A wet bed is usually a grading issue before it's a fabric issue. Once water has nowhere to go, the best product in the world won't make the roots happy. In those spots, the job isn't just installation, it's water management.
Avoiding Mistakes Maintaining Fabric And Hiring A Pro
Most bad fabric jobs fail in the same few ways. The seams are too tight, the edges are left uncovered, or the pins are spaced so far apart that the sheet lifts and wrinkles after the first storm. Those mistakes are easy to make and annoying to fix, especially once mulch has been dumped over the top.
Keep a simple maintenance rhythm
Check the bed after heavy rain, after mowing, and after any mulch top-up. Look for lifted seams, exposed fabric, clogged openings around plants, and spots where debris has started to build a new rooting layer. If mulch has thinned out, refresh it before the fabric gets too much sun.
Maintenance rule: If you can see the fabric often, the bed is already asking for attention.
Fabric replacement isn't a forever task, and the earlier section covered why buried or sun-baked material can become a liability. That's why the best long-term system is really a mix of cleanup, mulch renewal, and selective use rather than a blanket solution across every bed.
Know when to call a pro
Complex slopes, severe erosion, and multi-bed commercial installs can move past sensible DIY territory fast. Those jobs need cleaner grading, smarter drainage choices, and a layout that won't become a maintenance headache by next season. If you're still comparing local options, this guide on choosing the right landscaping company in Jackson, TN is a useful place to start.
For homeowners who want the bed to stay neat without turning into a weekend repair project, the smart move is to treat fabric as one part of the system, not the whole system. If you'd rather have the grading, drainage, and installation handled by a crew that knows West Tennessee soil, reach out to Lawn & Leaf Solutions for a straight answer on whether fabric is right for your yard and a plan that fits the way your property drains.