
A 100-linear-foot residential edging project usually costs about $150 to $3,000, depending on the material, and most homeowners can knock it out in a weekend with basic tools. The part that separates a clean border from a shaky one is simple, if you do it right, dig about 3 to 6 inches deep, bury at least 50% of the edging height, and keep the top edge only about 1/2 inch above grade.
If you've ever finished mulching a bed in Jackson or anywhere else in West Tennessee, stepped back, and seen grass already creeping back over the line, you know why edging matters. It doesn't just make a yard look finished, it keeps turf out of the beds, protects the edge from mower damage, and gives you a cleaner line that lasts through our clay soil and freeze-thaw swings.
Why Landscape Edging Matters for Your Yard
The usual story starts on a Saturday. You trim the border, spread fresh mulch, and clean up the edges so the yard looks sharp. Then the rain comes, the mower brushes the line, and a few weeks later the grass is sneaking back into the bed like nothing happened.
That's where proper edging earns its keep. A well-set border gives you a physical barrier between lawn and bed, which means less turf creep, less mulch migration, and fewer places for weeds to get a foothold. It also helps protect the edge of a bed from mower tires and string trimmers, which is where a lot of good-looking yards get chewed up first.
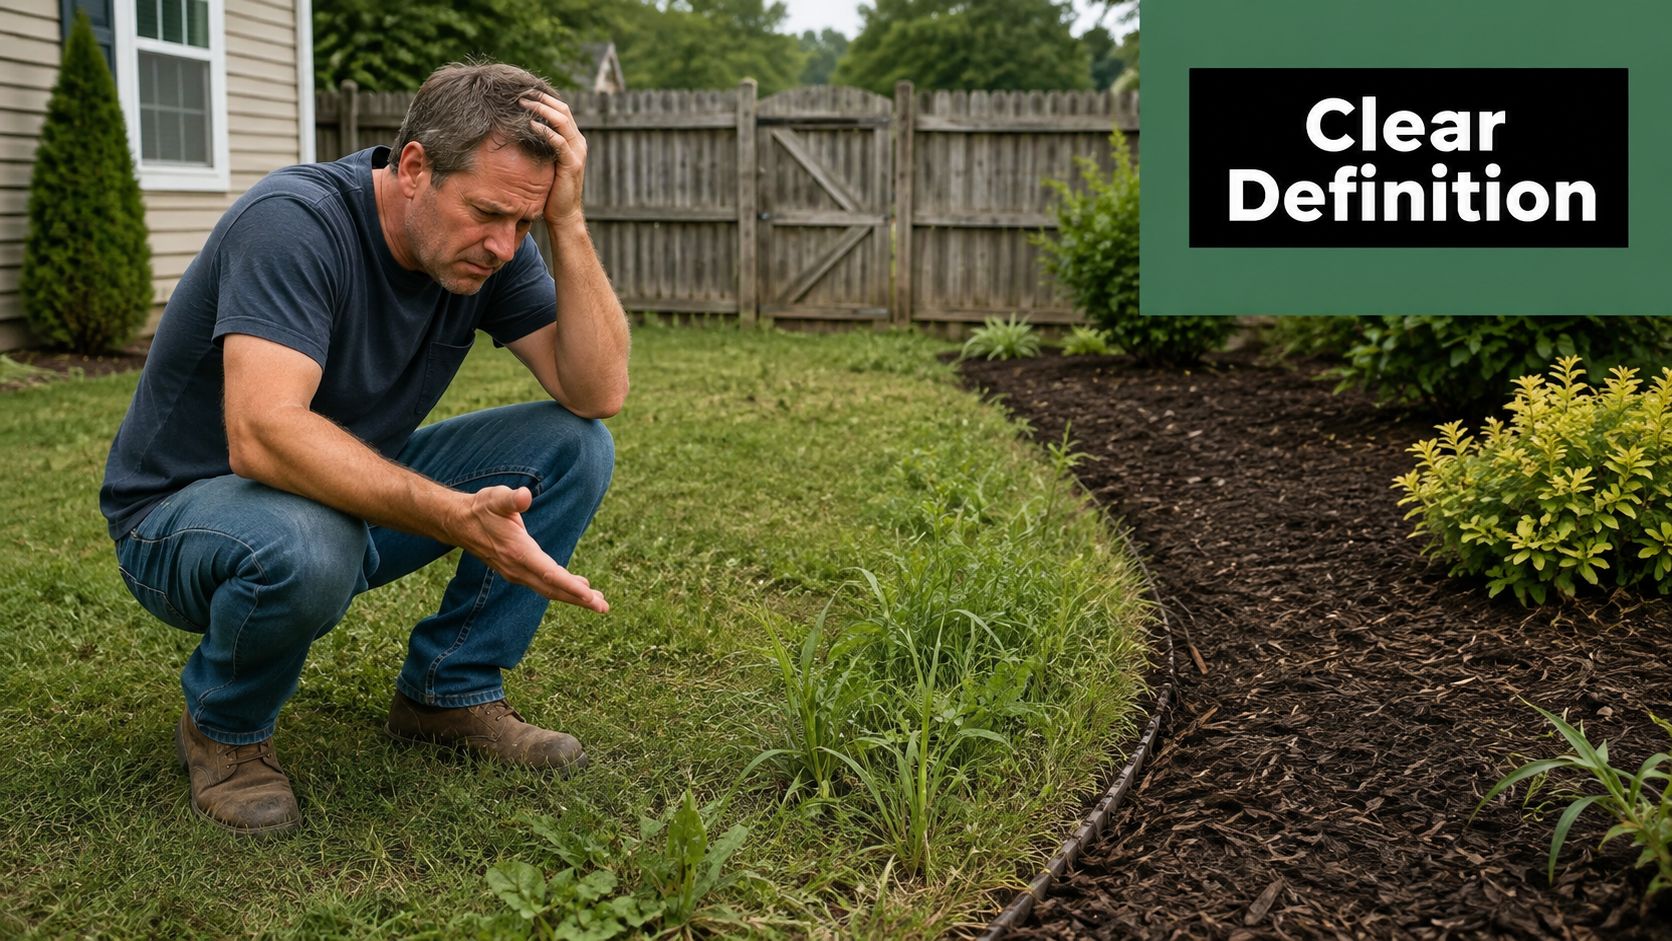
Why the edge fails when the installation is sloppy
In West Tennessee, the soil does a lot of the damage for you if the border isn't set right. Clay holds water, swells, and shifts when the weather changes, so a shallow or loosely anchored edge can start waving, leaning, or popping out of line before the season is over. That's why the method matters as much as the material.
A border that looks straight on day one can still fail if the base is soft, the stakes are too far apart, or the backfill never gets packed tight.
The goal isn't just a neat line for one photo. It's a border that stays put through mowing, storms, and winter movement, and that's where landscape design basics matter as much as the edging itself. If the line works with the bed shape, drainage, and traffic patterns, the edge lasts longer and asks for less maintenance.
Choosing the Right Edging Material for Your Project
Flexible plastic, steel, stone, and brick all solve the same problem, but they solve it in very different ways. The wrong choice usually shows up fast, either in the budget, in the install time, or in how the border looks after one season in clay soil.
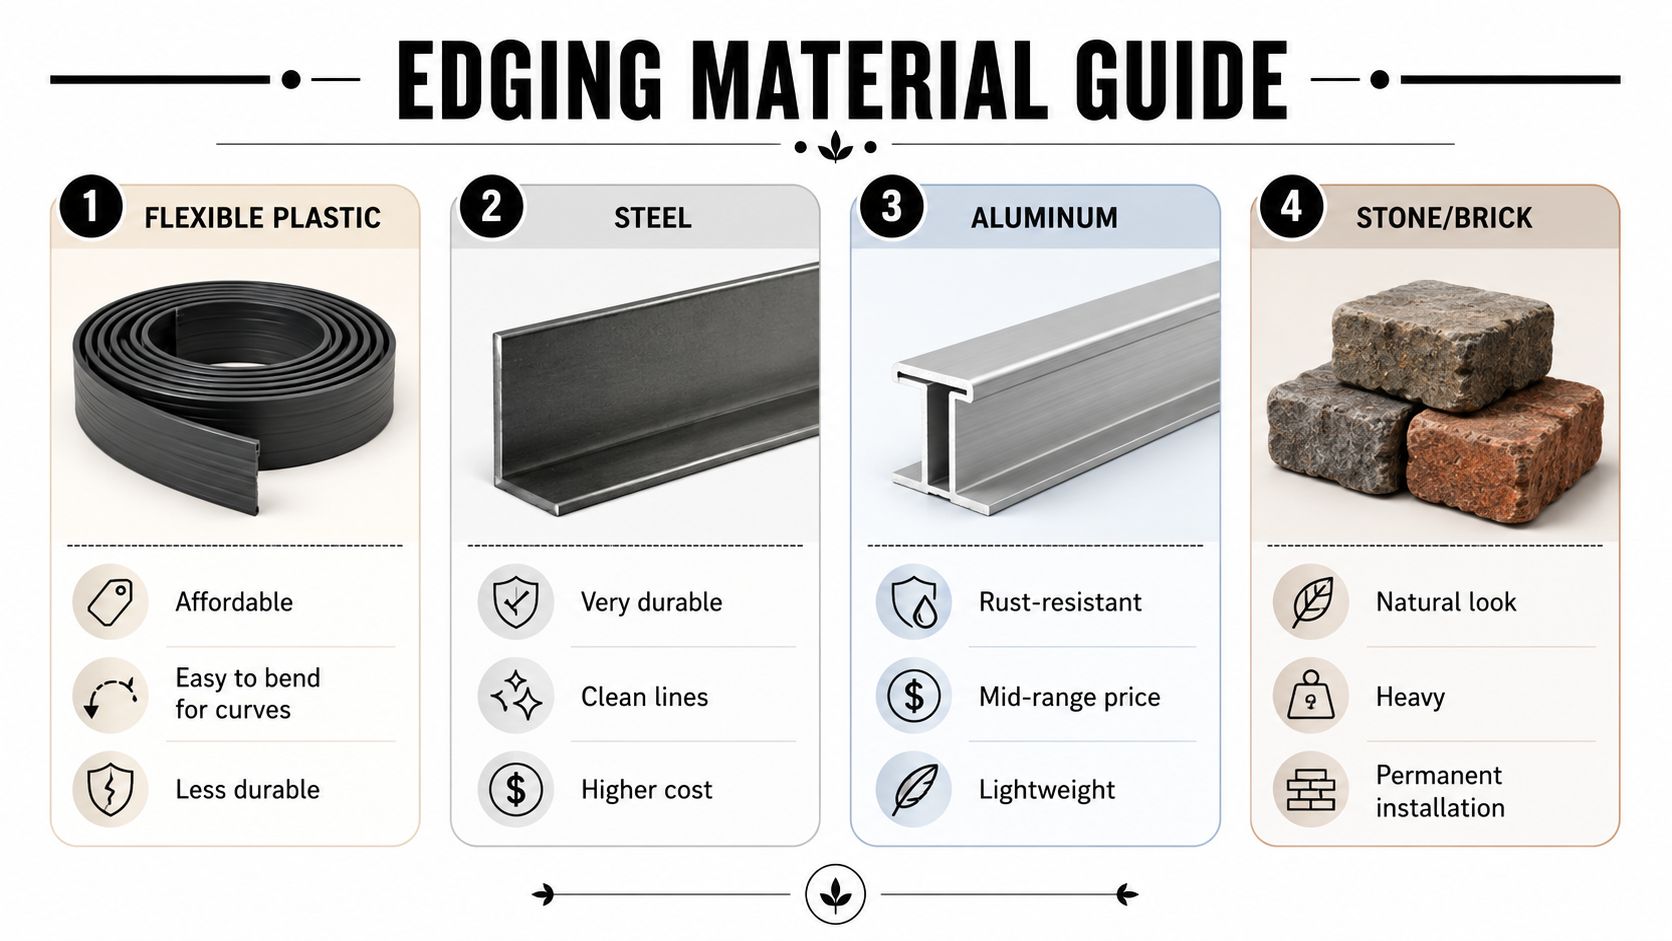
Material trade-offs that actually matter
Flexible plastic is the easiest starting point. It bends around curves, installs fast, and usually sits near the low end of the pricing range, which makes it a practical choice for homeowners working on a simple bed line or a short run near turf. It's also the material most likely to look sloppy if the trench isn't uniform or the stakes are spaced poorly, because it telegraphs every mistake.
Steel gives a cleaner, tighter look and tends to hold a straight line better than lightweight plastic. It's a stronger visual option for crisp beds and modern curb appeal, but it takes more effort to cut, shape, and secure. In West Tennessee, that extra rigidity helps on straight runs, though the border still needs solid anchoring so clay movement doesn't work it loose.
Aluminum sits in a similar design lane, with a lighter profile and rust resistance. It's easier to handle than steel, which helps on longer runs, but it still needs accurate layout and a stable base. It's a good fit when you want a more finished look without going all the way to stone.
Stone or brick is the premium-looking option, and it often makes the most sense where permanence matters more than speed. The trade-off is weight, labor, and the need for a more careful base. In wet spells or on ground that moves, that base becomes the project, not the border on top of it.
| Material | Cost per Linear Foot | Lifespan | Best For |
|---|---|---|---|
| Flexible Plastic | Low end of the market | Shorter if installed poorly | Curves, budget projects, DIY installs |
| Steel | Higher than plastic | Long if anchored well | Straight lines, clean finishes |
| Aluminum | Mid-range | Long with proper base prep | Lightweight projects, rust resistance |
| Stone or Brick | High end of the market | Very long when set correctly | Permanent borders, premium curb appeal |
For homeowners comparing border styles with broader hardscape choices, landscape rock installation near me is worth a look because the edging and the fill material need to work together. A border that looks good beside mulch may behave differently beside rock, especially if drainage is poor.
Gathering Tools and Preparing Your Work Area
A smooth edging job starts before the first scoop of dirt comes out. If the layout is marked cleanly and the tools are on hand, you spend your time shaping the border instead of hunting for a level or trying to pry out roots with the wrong tool.
What you should have on site
At minimum, grab a shovel, square-point spade, garden hoe, level, string line with stakes, hand tamper, and measuring tape. Those are the tools that keep the trench consistent and the edge honest. If you're working with flexible plastic, an edging saw or snips can save you time when cutting sections to length.
A mini compact plate can help on larger jobs, especially if you're firming a base in stubborn ground. If you're moving soil, mulch, or rock, a heavy-duty cart matters too, and steel wheelbarrow specs explained is a useful reference for judging whether a wheelbarrow is built for real site work or just light hauling.
Before digging, clear the line of rocks, roots, and loose debris. Mark the run with string or spray paint so you aren't guessing once the trench starts. If the ground feels wet and sticky, hold off until it firms up a bit, because West Tennessee clay is much easier to shape when it's not smearing into the sidewalls.

Practical rule: if the line isn't marked clearly from the start, the trench ends up following the operator's mood instead of the yard's layout.
A clean site also helps you spot problem areas before they turn into repairs. Old roots, buried construction debris, and soft spots near downspouts often show up right where you'd like the edge to be straight. For border projects that run alongside fabric or mulch beds, landscape fabric installation can help you think through what belongs under the edge and what should stay out of the trench.
Laying Out the Border and Digging the Trench
The border will only look as good as the line you stake out. If the run is crooked, the finished edge will be crooked too, no matter how expensive the material is.
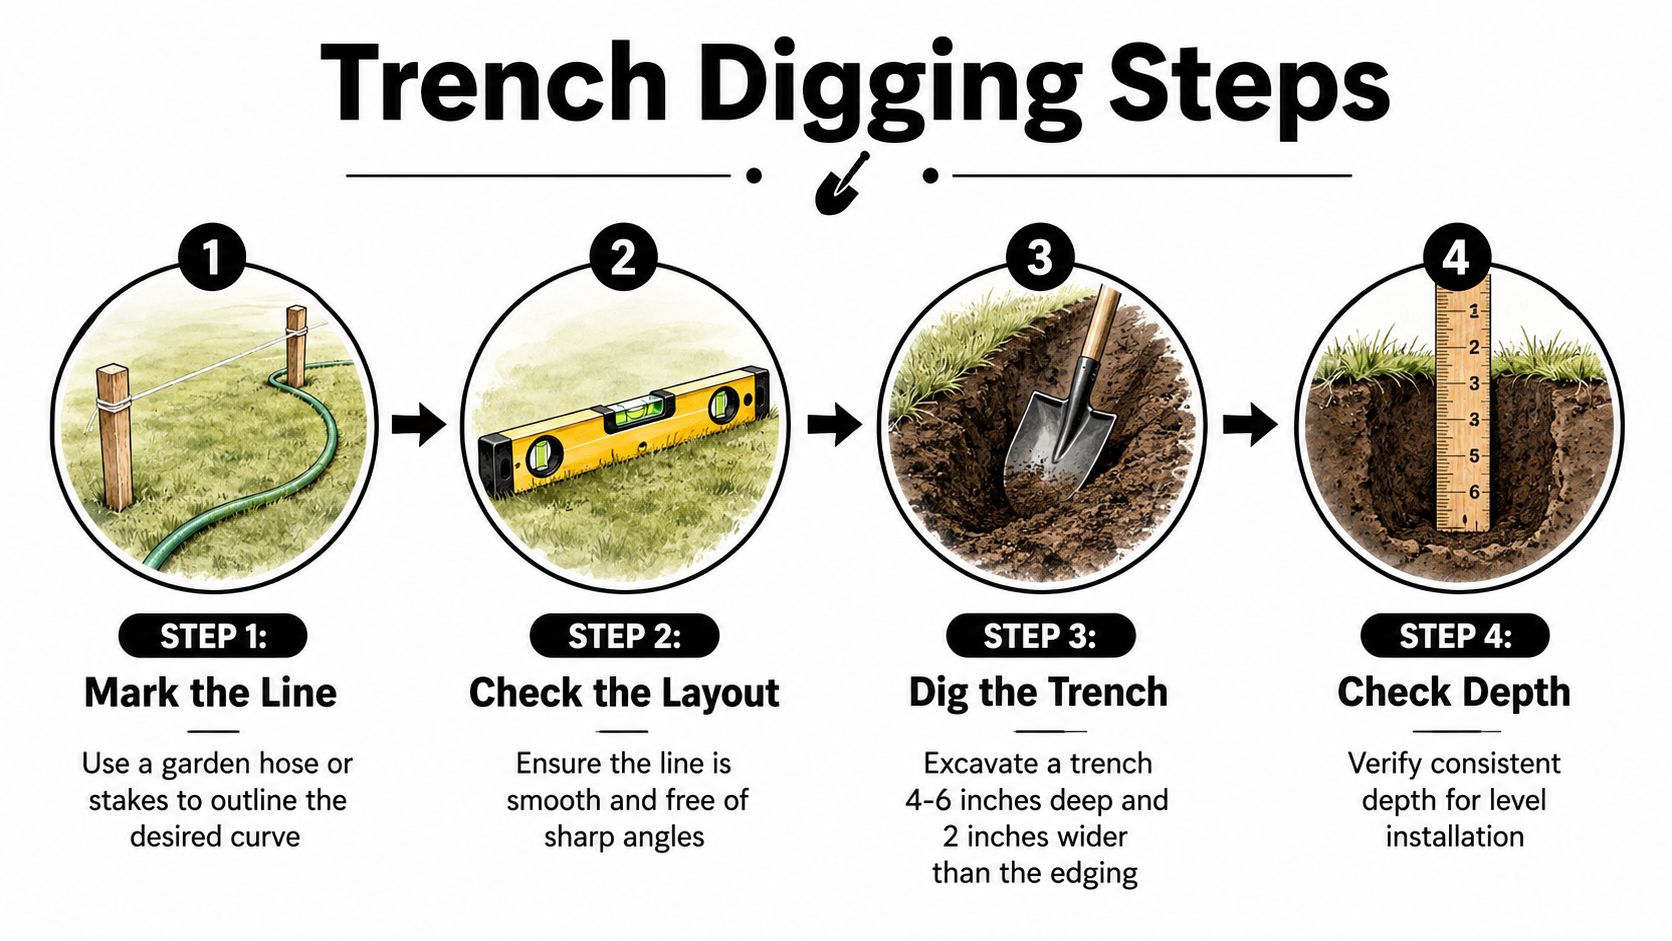
Start with the line, not the shovel
Set stakes and a string line first if you want a straight border. For gentle curves, use a hose or flexible marker to shape the run, then step back and look at it from the same angles you'll see from the driveway, sidewalk, or porch. Sharp angles rarely look intentional in a home setting, and they're harder to install cleanly.
A 3 to 6 inch trench depth is the widely cited rule for plastic edging, and that depth works because the buried section can resist lateral movement while the visible edge stays low enough to avoid becoming a trip hazard. The trench should also leave room to bury at least 50% of the edging height, with the top edge set only about 1/2 inch above grade and stakes placed every 2 to 5 feet. One instructional video goes tighter on support, suggesting 2 to 3 feet on some runs and estimating that a 50-foot roll may use about 15 to 20 stakes. For a homeowner, those numbers turn the job into a repeatable process instead of a guess.
Dig for the material, then compact the base
On clay soil, don't just carve a slot and call it done. Scrape the trench wall clean, then tamp the bottom firm so the edge sits on something that won't slump the first time the ground gets wet. If the site is rough or rooted, a better answer may be to fix uneven ground from roots before edging goes in, because a border can't stay level over a lumpy base.
A trench that changes depth every few feet almost always creates a border that waves later.
Keep the trench a little wider than the edging itself so you have room to align the material and backfill cleanly. On longer runs, check your depth often with a tape or a scrap of the edging material. If you want the line to stay straight, consistency beats speed every time.
Setting and Anchoring the Edging in Place
Once the trench is ready, placement becomes a matter of patience. The edge needs to sit low, stay level, and resist the kind of shifting that happens when a mower brushes it or the soil moves after rain.
Place it low, then lock it down
For plastic edging, unroll the material along the trench and let it relax before you force it into position. Set the top edge about 1/2 inch above grade, then make sure at least 50% of the height is buried so the piece isn't perched on loose soil. That balance gives you a clean visual line without creating a lip that catches a mower deck or toe.
Drive stakes at the recommended intervals, generally every 2 to 5 feet, and tighten that spacing on curves or at transition points near walkways and driveways. One guide and video combination on plastic edging puts the stakes every 2 to 3 feet on some installations, which matches what I've seen on jobs where clay and weather have a habit of pushing edges around. For curves, closer staking and small adjustments beat trying to bend the whole run at once.
Steel and other rigid borders need more careful joining. Cut them cleanly, connect sections tightly, and anchor each segment so the joint doesn't open after the first seasonal shift. If the project includes corners, transitions, or changes in elevation, spend extra time there, because that's where many borders separate or buckle.
Keep checking the line as you work
A level is not optional. Check the top edge as you go, then step back and sight the run from different angles. If the line starts to snake, fix it immediately instead of hoping backfill will hide it.
For homeowners comparing materials and install styles, landscape timber installation is worth looking at because timber borders behave differently from plastic or steel and often need a different anchoring mindset. On any material, the rule stays the same, set it straight now or repair it later.
Practical rule: if you can feel the edge shifting by hand before backfill goes in, it isn't anchored enough.
Backfilling, Finishing, and Maintaining Your Edging
Backfill is where a lot of decent-looking edging gets ruined. If the soil stays loose, the border moves. If the grade slopes the wrong way, water sits against it and starts working it loose.
Pack the trench in lifts
Don't dump all the backfill in at once. Add it in layers, tamp each lift firmly, then check the alignment again before adding more. That slower approach locks the edging in place and cuts the odds of wavy lines after the first hard rain.
Shape the finished grade so water drains away from the border instead of pooling against it. That matters even more in West Tennessee, where wet spells can soften clay and let edging drift out of line. Once the backfill is firm, finish the bed with mulch, soil, or sod so the border looks intentional instead of patched in. A clean finish also helps keep the top edge visible, which makes future checks easier.
Keep an eye on it through the seasons
A quick inspection in spring and fall catches most problems early. Look for loose stakes, lifted joints, or sections that have started to lean after winter movement. If you see a small shift, re-tamp it before it becomes a long crooked stretch.
Maintenance is cheaper than rebuilding a run that has already moved. A guide on edging costs shows that residential projects often fall in the 50 to 200 linear foot range, with a typical 100-linear-foot project costing about $150 to $3,000 depending on material, plus material costs around $0.50 to $15 per linear foot and professional installation around $1 to $15 per linear foot. A separate industry guide says well-installed commercial-grade edging can last 20 to 25 years, while poorly installed cheap edging may fail in only 3 to 7 years. The install method, especially trench depth, staking, and compacted backfill, is what separates those outcomes. For a broader view of how edging fits into the rest of the yard budget, landscaping project cost breakdown is a practical comparison point.
A neat line only stays neat if the finish grade supports it. If you want the border placement, grading, and drainage to work together from the start, landscape design company services can make sense.
Common Problems and When to Hire a Professional
The three problems I see most often are drainage, clay movement, and freeze-thaw heave. They do not always show up right away, which is why edging that looked fine in summer can start looking tired after one winter.
What usually goes wrong in West Tennessee
Poor drainage is the quiet killer. When water pools against the border, the soil loosens, stakes lose their grip, and the edge starts to lean. The fix is usually to regrade the bed slightly away from the edging and tighten the backfill, but if the water has nowhere to go, the problem keeps coming back.
Expansive clay is the other big one. It holds moisture, swells, and shrinks, which puts side pressure on the border and can pull it out of alignment. A compactible base and firm tamping help, and closer stake spacing on curves or soft areas usually pays off. That matters even more in heavy West Tennessee soil, where a clean install can still shift if the base was rushed.
Freeze-thaw cycles can lift a border even when the install looked solid in warm weather. The answer is more buried depth, tighter staking, and regular checks after cold snaps. If the edge rides up in one section, do not just push it back and walk away, because the base likely needs correction too.
When the job starts making less sense as DIY
A homeowner can usually handle a straightforward bed border, but some projects deserve a pro. If the run is long, the slope is steep, the clay is hard enough to fight hand tools, or the design includes complex curves and material transitions, a licensed professional can save time and avoid rework. That is especially true when edging has to work with drainage fixes or heavy-use areas near driveways and walkways.
The price range from the 2026 guide, $150 to $3,000 for a typical 100-linear-foot project, helps explain why. On a simple border, DIY can make sense. On a larger layout with uneven ground, water issues, or premium materials, the cost of fixing a failed install can eat up the savings fast. A careful plan from a landscape design company can also keep the edging, slope, and drainage working together instead of fighting each other.
| Project Size | Material Cost Range | Installation Cost Range | Expected Lifespan |
|---|---|---|---|
| Typical residential edging project, 50 to 200 linear feet | $0.50 to $15 per linear foot | $1 to $15 per linear foot | 20 to 25 years if well installed, 3 to 7 years if poorly installed |
| Typical 100-linear-foot project | About $150 to $3,000 total depending on material | Included in the per-foot labor range | Same lifespan gap applies |
If you want a deeper look at how site work, border shape, and drainage fit into one plan, landscaping project cost breakdown is a useful comparison point, and the border lasts longer when the whole system supports it.