
You're standing in the backyard with a tape measure, one eye on a rough sketch, and a phone full of saved patios that all look good until you try to fit them into your real yard. That's where most homeowners get stuck. The design looks easy on screen, then the first hard question shows up, where does water go, where does the slope break, and what happens after the first heavy rain?
Garden planning software for homeowners exists to answer the part of the problem that napkin sketches never touch. It turns a vague idea into a measured layout you can discuss, revise, and share before you spend money on plants, pavers, or labor. Used well, it saves time and keeps you from building a pretty mistake.
Why Homeowners Are Reaching for Digital Yard Planning Tools
A homeowner usually starts the same way. You walk the yard, hold a tape measure in one hand, and try to picture a patio where the grass is now, maybe with a bed under the front window and a few trees near the fence. The trouble is that pencil sketches and memory don't protect you from mature plant size, awkward traffic flow, or the fact that your “flat” side yard may not be flat at all.
That's why digital planning tools have taken over the early stage of yard work. They replace guesswork with a layout you can measure, move, and compare before anything gets installed. If you want a practical starting point for new-home layouts, the guide to landscaping ideas for new homes is a useful companion because it forces the same discipline, think in zones, not just in looks.
What the software replaces
It replaces the vague handoff that happens when a homeowner tells a contractor, “I want it to feel cleaner back here,” and hopes the message lands. It also replaces the bad habit of placing plants by eye and assuming they'll still fit in three years. A tool that works to scale gives you a real draft, not a mood board.
Practical rule: if you can't measure it, you can't design it well.
That's the appeal. Homeowners aren't chasing software because they want shiny renderings. They want a clearer answer to a simple question, “Will this idea work in my yard?” For that, digital planning beats pencil and paper every time.
If you want to see how AI is being used in the category, the AI landscape design tool overview is a good reference point because it shows how quickly the market has moved from rough concepts toward more guided planning.
What Yard Design Software Does
Yard design software is a digital tool that lets you lay out a yard to scale, place plants or hardscape, and preview the result before a shovel hits the ground. It can be a phone app, a browser planner, or a full desktop suite. The point stays the same, turn a yard idea into a visual plan you can test.
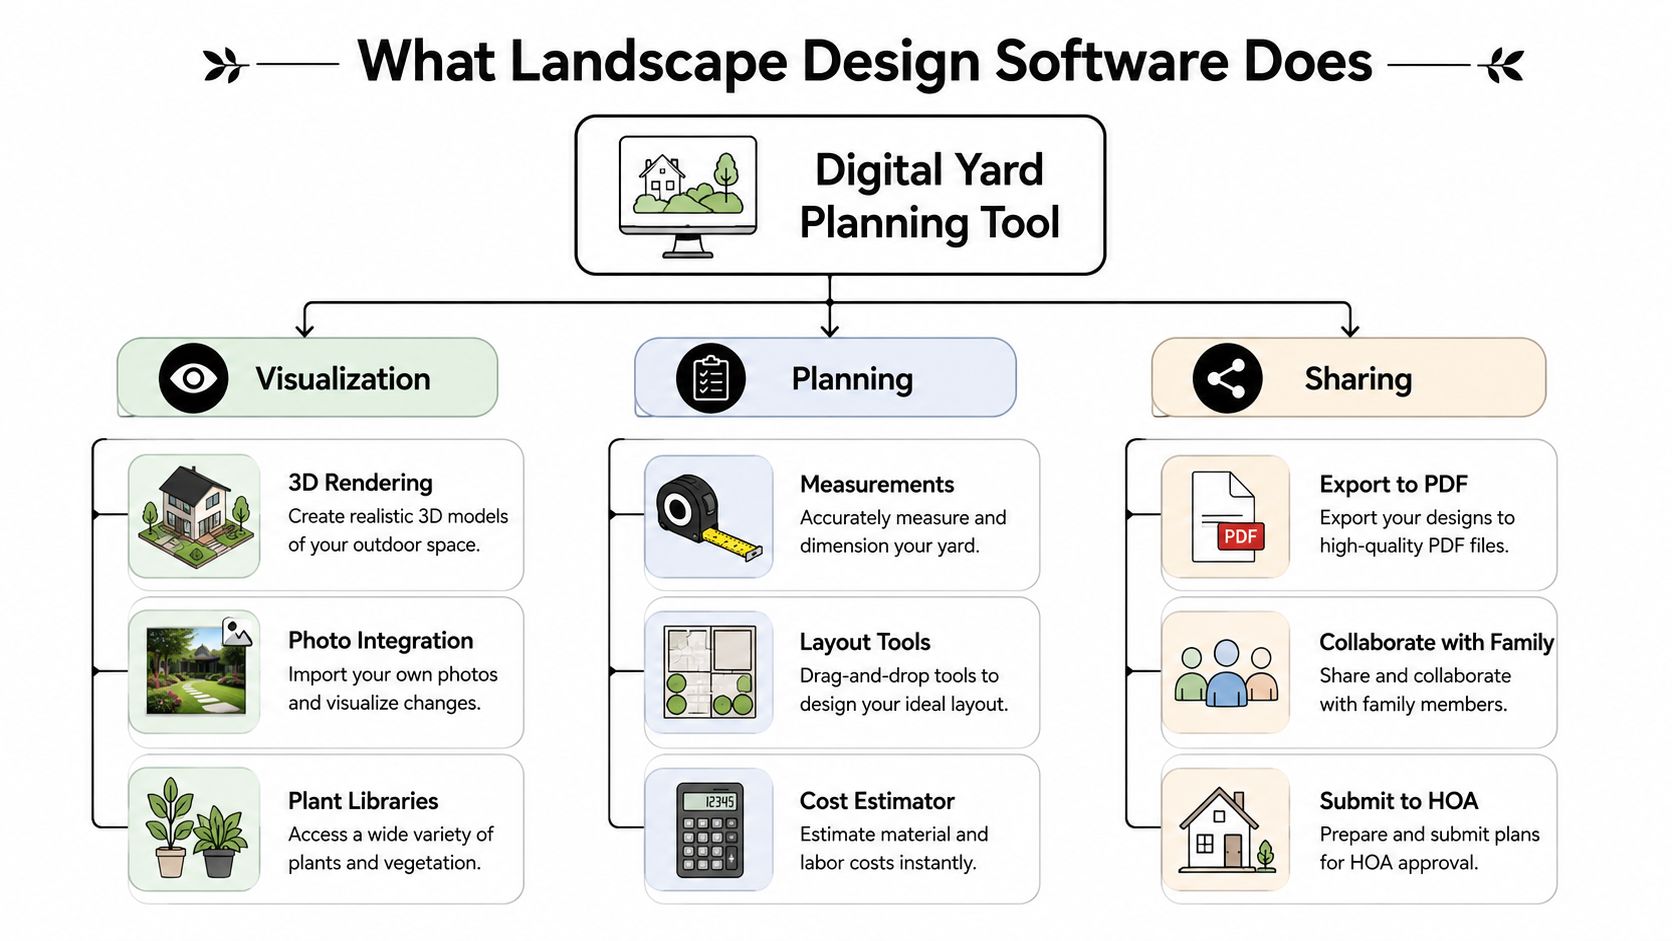
The six features that matter
Start with ease of use. If you cannot get a base plan on screen within a few minutes, the tool is probably too heavy for a homeowner project.
Then check the plant and material library. A good tool should let you test beds, trees, pavers, edging, and other common pieces without forcing you to draw everything from scratch.
Next, ask whether the software does 2D, 3D, or both. A 2D plan helps with layout and scale, while 3D helps you understand how the finished yard will feel from the house or driveway.
Look at the pricing and licensing model. Free access is fine for rough concepts, but paid tools usually earn their keep when you need exports, richer libraries, or cleaner output.
Check mobile and web availability. If you will measure the yard with your phone and sketch ideas on the porch, a browser or mobile-friendly app makes more sense than a desktop-only program.
Pay attention to any irrigation or drainage layer. That is the rare feature that starts to matter on real properties, because layout alone does not tell you how water moves.
A five-minute shopper test
Ask yourself these questions before downloading anything.
- Can I draw my yard to scale without fighting the interface?
- Does it include enough real plants and materials for my project?
- Will I get a useful 2D plan, a believable 3D view, or both?
- Can I export something a spouse, HOA, or contractor can read?
- Does it help with water, grading, or only with appearance?
For homeowners comparing tools, the landscape design basics guide is worth pairing with any app because it keeps the plan grounded in actual site logic, not just style.
If you want a simple app to map a room-sized outdoor area, it is easy to find a floor plan creator app and use that as a starting point, especially if you are comfortable thinking in rooms and zones rather than in botanical detail.
The best software is not the prettiest one. It is the one that helps you make fewer mistakes before you buy anything.
Free Web and Mobile Apps Versus Paid Desktop Suites
Free and freemium tools are where most homeowners should start. They're easy to open, they don't ask for much training, and they're good for quick concept work when you just want to test whether a patio fits behind the house or whether a bed should wrap the corner. Paid desktop suites go deeper, and that depth matters once the design needs precision, stronger exports, or a bigger plant library.
Side by side trade-offs
| Feature | Free Web or Mobile Apps | Paid Desktop Suites |
|---|---|---|
| Ease of access | Open fast, little setup | More setup, more control |
| Learning curve | Usually lighter | Usually steeper |
| Plant and material depth | Often limited | Usually richer |
| Scale accuracy | Good for concepts, varies by tool | Stronger for measured plans |
| 3D and render quality | Basic to decent | Better realism and detail |
| Export quality | Often limited | Better for contractor sharing |
| Best use | Early ideas, quick mockups | Detailed planning, handoff files |
If you want a simple app to map a room-sized outdoor area, it's easy to find a floor plan creator app and use that as a starting point, especially if you're comfortable thinking in rooms and zones rather than in botanical detail.
Which tier fits which job
Free apps work when the project is small and the goal is visual clarity. A homeowner can sketch beds, move a path around, or check whether a grill area crowds the back door. That's enough for a lot of refresh projects.
Paid desktop suites make more sense when the plan has to hold up under scrutiny. If you're trying to size planting beds correctly, coordinate patio edges, or hand a clean file to a contractor, the extra control pays off. The same is true when you want a better export, because a contractor wants a readable plan, not a fuzzy screenshot.
Good cutoff: use free tools for ideas, paid tools for decisions.
Most homeowners end up doing both. They start with a free planner, then move up when the project gets serious or the free tier starts getting in the way. That's the sensible path, and it keeps you from paying for depth you don't need on day one.
A Practical DIY Workflow From Measurements to Shareable Plan
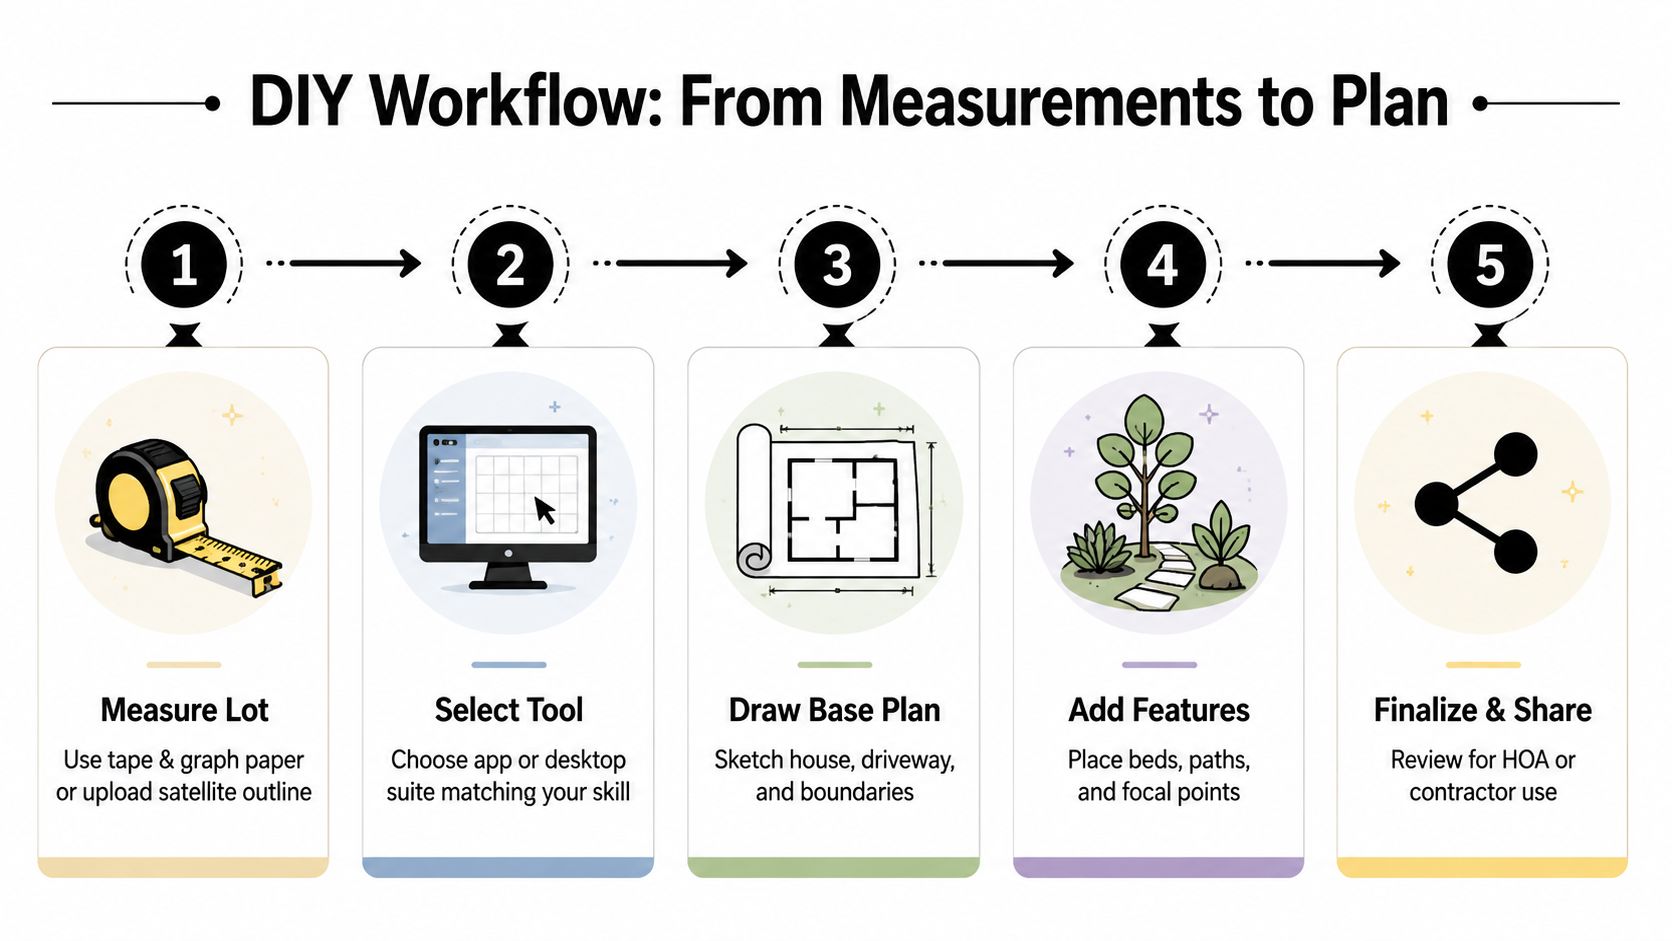
A workable yard plan starts with measurements, not plant choices. Measure the lot by hand if that is easiest, or trace the outline from a satellite image if the tool lets you import one. Either way, do not start by placing shrubs. Start by getting the yard's bones on the page.
Draw the base first
Mark the house footprint, driveway, property line, trees you plan to keep, and anything that affects the layout, like utility boxes or a slope. If you are building raised beds, the planning should happen after the base is correct, not before. The guide on how to build raised garden beds makes more sense once you already know where the bed belongs and how large it can be.
Use scale on purpose
A plan only helps if the scale is honest. SmartDraw notes that yard design plans are commonly drawn at a 1:8 scale, and that matters because scaled drawings cut down on placement mistakes when you convert yard measurements into actual plant or patio locations (SmartDraw outdoor design software). If your tool supports custom scale, use it. If it does not, do not trust the output as anything more than a sketch.
A clean scale also makes it easier to talk through the plan with someone who cares about fit, access, and buildability. If you want a plain example of what a floor plan should communicate, the Pinnacle Property Media buyer guide is a useful reference for reading layout drawings without getting lost in the visuals.
Place zones before plants
Drop in the functional parts first, seating, play space, paths, grill area, then add beds and focal points around them. That keeps the design honest about circulation. It also keeps you from buying plants that look good in a render but block a doorway or squeeze a walkway.
If you are sketching a raised planting area, set the footprint before you pick materials or fill depth. A bed that looks fine on screen can still crowd a path, steal too much yard, or sit in the wrong spot for drainage.
Export something useful
Save the plan as a PDF, SVG, or image file so it can be emailed, texted, or printed. A clean export is the difference between “I had an idea” and “here is the layout, let's price it.” If the file is readable, it can start a real conversation with a contractor.
A good export does not prove the yard is buildable, it only proves the idea is clear enough to discuss.
That is the primary goal for DIY software. Clarity first, then a site check, then a decision about whether the project stays in your hands or moves to a professional assessment.
Where Software Stops and Site Reality Takes Over
A polished render can fool people into thinking the plan is finished. It isn't. Software is good at showing layout, style, spacing, and how a yard might look on a fairly straightforward lot. It is much weaker at telling you what happens when water starts moving, soil shifts, or grade changes affect the whole property.
The stuff software handles well
It can help you line up a patio, choose a better bed shape, or see whether a tree will crowd the house. It's especially useful for visual comparison, because you can test two or three ideas without touching the ground. On a lot that's already fairly stable and flat, that's a real advantage.
The stuff it misses
Software usually doesn't solve drainage, grading, or soil behavior. It won't tell you whether runoff will pool behind the patio after a storm, or whether a planting bed is sitting in the path of future water movement. It also won't warn you that a shade tree could conflict with a drain line or a future French drain run.
A yard can look great in a render and still fail in a thunderstorm. A pretty layout doesn't stop standing water, and it doesn't protect a foundation from bad slope decisions. Homeowners get into trouble by trusting the image more than the ground.
Read the render as a concept, not a promise
Use the visual to answer style questions. Use a site assessment to answer performance questions. If the yard has low spots, persistent wet areas, erosion, or anything near the foundation, the software is only the opening move.
The best habit is simple. If the plan changes the way water moves, stop treating it like a DIY design exercise and start treating it like a site problem. That's the line most homeowners should respect.
When to DIY and When to Call a Licensed Contractor
DIY is the right call for concept planning, bed refreshes, mulch layouts, edging, and visual mockups you want to show a spouse or HOA. It's also fine for simple plant placement when the ground is already behaving and the project is mostly about appearance. Once the work starts affecting water, slope, or structure, the job changes.
Clear DIY territory
- Bed refreshes: Reworking shrubs, mulch, and seasonal color.
- Simple layout mockups: Testing a path, seating area, or focal point.
- Visual approvals: Showing family members or an HOA the general look.
Clear contractor territory
- Significant grading: Any change that alters slope.
- Standing water: Patches that stay wet after rain.
- Foundation-adjacent drainage: Anything that could affect the house.
- Mainline irrigation changes: More than a simple add-on.
- Neighbor impact: Work that could send water or grade changes off your property.
If the issue touches trees, roots, or a potentially risky removal near structures, it's smart to look at tree service in Jackson, TN as part of the bigger site picture, because roots and canopies can shape drainage and design decisions more than people expect.
What to bring to the handoff
Bring a clean concept plan, rough measurements, photos of problem areas, and a short priority list. That gives a contractor something concrete to work from instead of a vague wish list. A good contractor can take that file, flag drainage risks, translate the concept into something buildable, and provide a fair price.
That handoff is where a good plan starts saving you money. Not because the software did everything, but because it got the conversation out of the fog.
Your Next Step for a Workable Yard Plan
Start with the software, but do not let it pretend to be the final answer. Use it to test the look of the yard, then check the real-world issues that decide whether the plan works, especially drainage, grading, and where water wants to go after a hard rain.
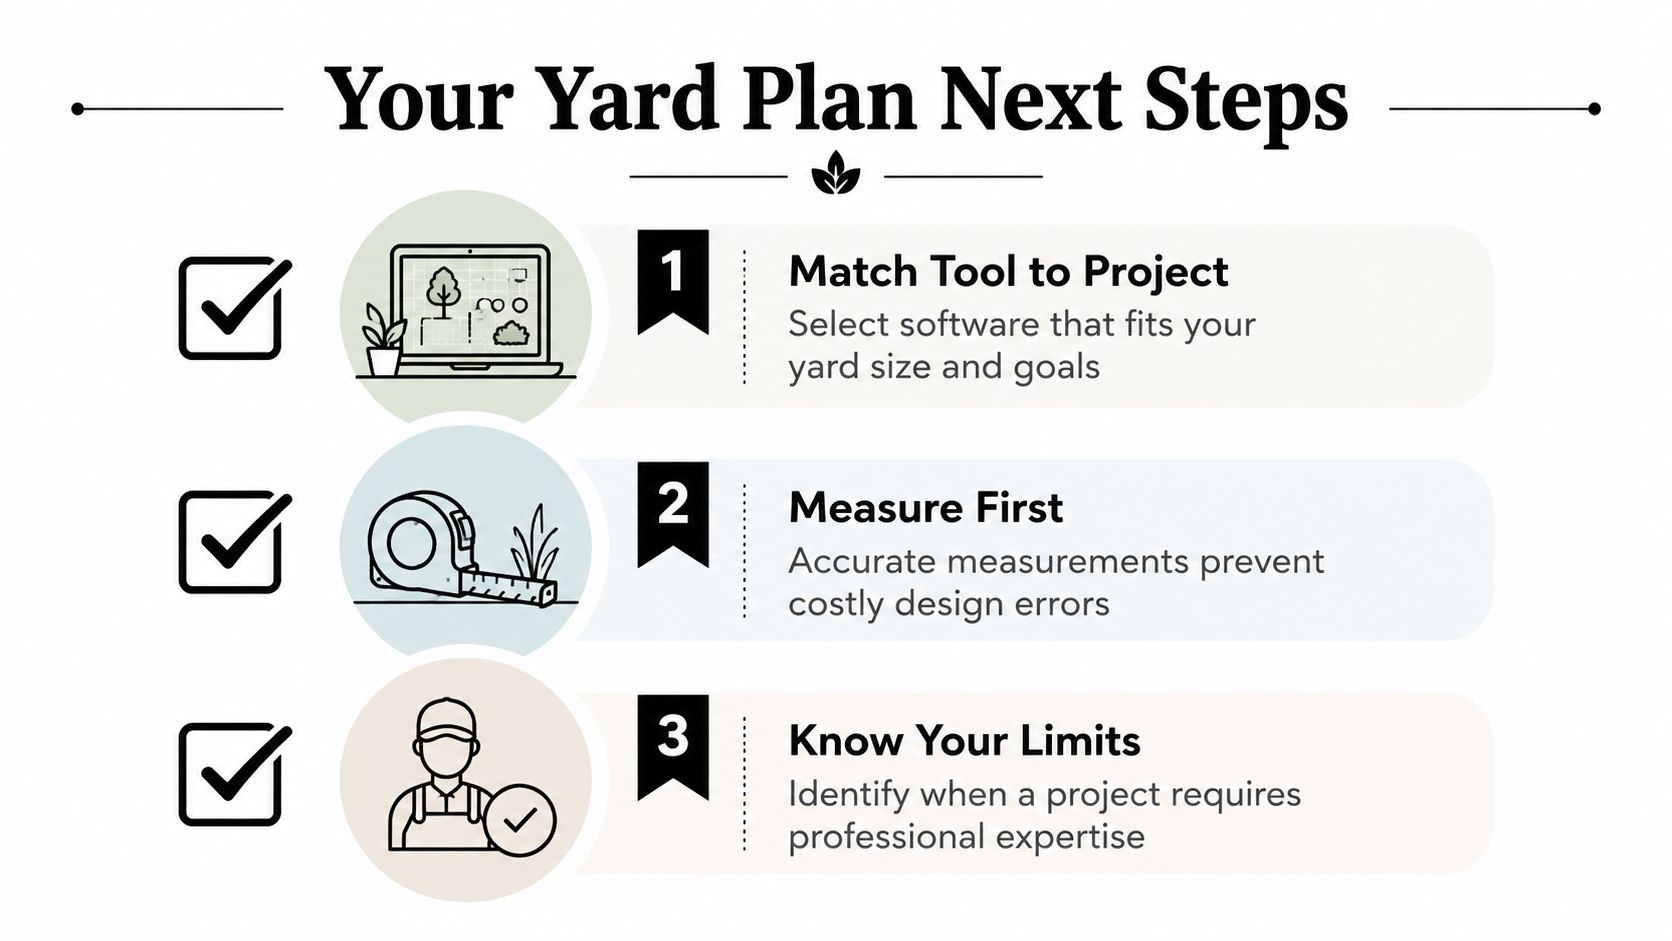
A quick checklist to keep
- Match Tool to Project: Choose software that fits your yard size and goals.
- Measure First: Accurate measurements prevent costly design errors.
- Know Your Limits: Identify when a project requires professional expertise.
If water use is part of the plan, the water conservation landscaping ideas guide is worth your time because it keeps the focus on function, not just appearance.
Sketch the yard this weekend, export the plan, and look hard at every low spot, runoff path, and edge near the house. If the design starts depending on slope changes, drainage fixes, or anything that could affect the structure, stop treating it like a simple DIY job.
If your yard plan needs more than a pretty mockup, schedule a consultation with Lawn & Leaf Solutions in West Tennessee. Our team will review drainage, grading, planting, or a full outdoor design plan before you spend money the wrong way.