Step-by-Step Process of Professional Lawn Sod Installation
A lush, green lawn can transform the look and feel of your property. It enhances curb appeal, creates a welcoming atmosphere, and provides a comfortable space for outdoor activities. One of the fastest ways to achieve a vibrant lawn is through lawn sod installation. Unlike traditional seeding, sod offers instant results and ensures your lawn establishes quickly and uniformly. In this article, we’ll walk you through the step-by-step process of professional sod installation and share essential tips to help your lawn thrive.
Understanding Lawn Sod Installation
Lawn sod installation involves laying pre-grown grass rolls onto prepared soil. This method provides a fully developed lawn immediately, unlike seeding, which can take weeks or months to establish. Sod installation is particularly effective for areas that experience heavy foot traffic, uneven growth, or erosion problems. With proper preparation and care, sod establishes strong roots in just a few weeks, resulting in a durable and healthy lawn.
Professional sod grass installation requires precision, planning, and an understanding of soil and grass types. Whether you are installing Bermuda, Kentucky bluegrass, or fescue, following a systematic process ensures long-term success.
Step 1: Lawn Assessment and Planning
Before starting any sod installation service, it’s crucial to assess your lawn’s current condition. This includes:
- Measuring the area to determine the amount of sod required.
- Identifying sun and shade patterns to choose the appropriate grass type.
- Checking for drainage issues or low spots that might require leveling.
Proper planning ensures that you order the right amount of sod and select a grass variety suited to your climate and soil. Professional services often provide expert recommendations to optimize lawn growth and longevity.
Step 2: Soil Preparation
The foundation of a healthy lawn is well-prepared soil. Follow these steps for optimal sod grass installation:
- Clear the Area: Remove any old grass, weeds, rocks, and debris. This step prevents competition for nutrients and ensures the sod establishes correctly.
- Grade the Soil: Level the area to prevent water pooling. Gentle slopes can direct water away from structures and avoid erosion problems.
- Loosen the Soil: Use a rototiller or garden fork to aerate the soil. Loosening the top 2–3 inches allows roots to penetrate easily.
- Add Soil Amendments: Depending on soil quality, add compost or topsoil to improve nutrient content. A soil test can guide the type and amount of amendments needed.
- Fertilize: Apply a starter fertilizer to provide essential nutrients that encourage root growth.
Proper soil preparation is one of the most critical steps in ensuring a strong, healthy lawn.
Step 3: Choosing the Right Sod
Not all sod is created equal. Selecting the correct type for your lawn’s conditions is crucial for long-term success. Consider the following:
- Climate Suitability: Warm-season grasses like Bermuda or Zoysia thrive in sunny regions, while cool-season grasses like fescue or Kentucky bluegrass grow well in shaded or temperate areas.
- Usage Needs: High-traffic areas may benefit from durable, wear-resistant grass varieties.
- Appearance: Consider texture, color, and growth habits to match your aesthetic goals.
A reputable sod installation service can guide you in selecting the best sod type based on your property and lifestyle needs.
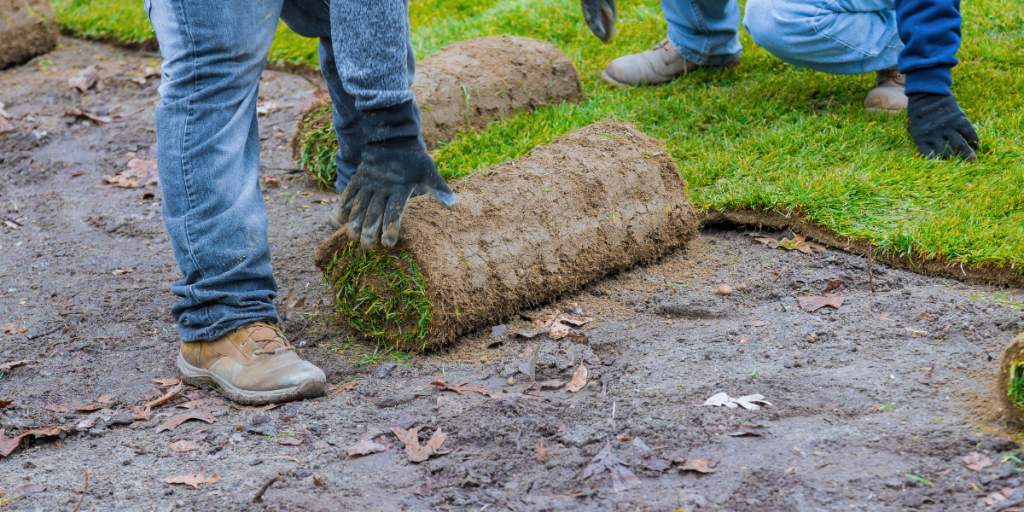
Step 4: Laying the Sod
Now comes the exciting part: laying the sod. Follow these steps for professional results:
- Start Along a Straight Edge: Begin along a driveway, sidewalk, or property line for a neat, uniform appearance.
- Stagger the Seams: Lay sod pieces in a brick-like pattern to avoid continuous seams, which can dry out or separate.
- Fit Pieces Tightly: Press edges together without overlapping to prevent gaps where weeds can grow.
- Cut to Fit: Use a sharp knife to trim sod around curves, trees, or obstacles.
- Roll the Sod: Lightly roll the lawn with a lawn roller to remove air pockets and ensure good soil contact.
Proper installation maximizes root-to-soil contact, which is essential for the sod to take hold.
Step 5: Watering and Initial Care
Watering is critical during the first few weeks of lawn sod installation. Follow these sod installation tips for a healthy start:
- Immediate Watering: Water the sod immediately after installation to moisten the soil beneath.
- Daily Watering: Keep the soil consistently moist for the first 2–3 weeks, usually requiring daily watering in the early morning or late evening.
- Gradual Reduction: After roots establish, gradually reduce watering frequency while increasing depth to encourage deep root growth.
Avoid overwatering, which can cause root rot, and under-watering, which can lead to dry patches.
Step 6: Mowing and Maintenance
Once your sod has rooted, proper mowing and ongoing maintenance ensure a healthy, vibrant lawn:
- Mowing: Wait until the grass reaches 3–4 inches before the first mow. Set mower blades high to avoid stressing young roots.
- Fertilizing: Apply fertilizer every 6–8 weeks during the growing season to provide essential nutrients.
- Weed Control: Remove weeds promptly and consider pre-emergent herbicides if needed.
- Aeration: Aerate your lawn annually to reduce soil compaction and promote root health.
Regular maintenance keeps your lawn dense, green, and resilient to pests, diseases, and environmental stress.
Step 7: Professional Sod Installation Services
While DIY sod grass installation is possible, professional sod installation services ensure efficiency, accuracy, and optimal results. Experts bring experience in soil preparation, proper laying techniques, and long-term care recommendations. Additionally, professional services often provide warranties or guarantees, giving homeowners peace of mind.
For homeowners looking to transform their property quickly, hiring a reputable company like Lawn & Leaf Solutions ensures that your sod installation is done right the first time, leading to a healthy, flourishing lawn that lasts for years.
Conclusion
Investing in lawn sod installation is one of the most effective ways to achieve a beautiful, green lawn almost instantly. By following a systematic process—from soil preparation and sod selection to proper watering and maintenance—you can enjoy a vibrant outdoor space that enhances your home’s aesthetic and functional value.
Remember these key sod installation tips: prepare your soil thoroughly, select the right grass type, stagger sod seams, water consistently, and maintain your lawn regularly. With the guidance of professional sod installation services, your property can enjoy a lush, durable lawn that becomes the envy of your neighborhood.
Ready to elevate your outdoor space? Explore professional lawn sod installation services today and take the first step toward a healthier, greener lawn.